

- Dropbox: Dropbox copies saved files both ways. Add the
pdflatexhook only. - Git: You pull and push a Git repository. Add the
pdflatexhook and Git.
Get the project
Use one of these two ways to get a local folder, then continue with Open the project.Dropbox
Use Dropbox when Overleaf already copies the project into a local folder. Link Dropbox in Overleaf Account Settings, then confirm the project folder exists underDropbox/Apps/Overleaf. Open that project folder, not the parent Overleaf folder.
Git
Use Git when you clone the project and move accepted files with pull and push. Connect the Overleaf project to GitHub, or copy its Git URL from the Overleaf project menu. Then run:~/writing/my-paper contains the TeX source and that git status runs there without an error. Pull before each writing session so the local files include changes made in Overleaf.
Open the project
Start DocWriter in watch mode so it opens this project and watches its files for outside changes. Use the Dropbox folder or the Git clone you just confirmed:Dropbox/Apps/Overleaf. Watch mode matters for both methods: Dropbox writes Overleaf changes onto disk, and a Git pull does the same.
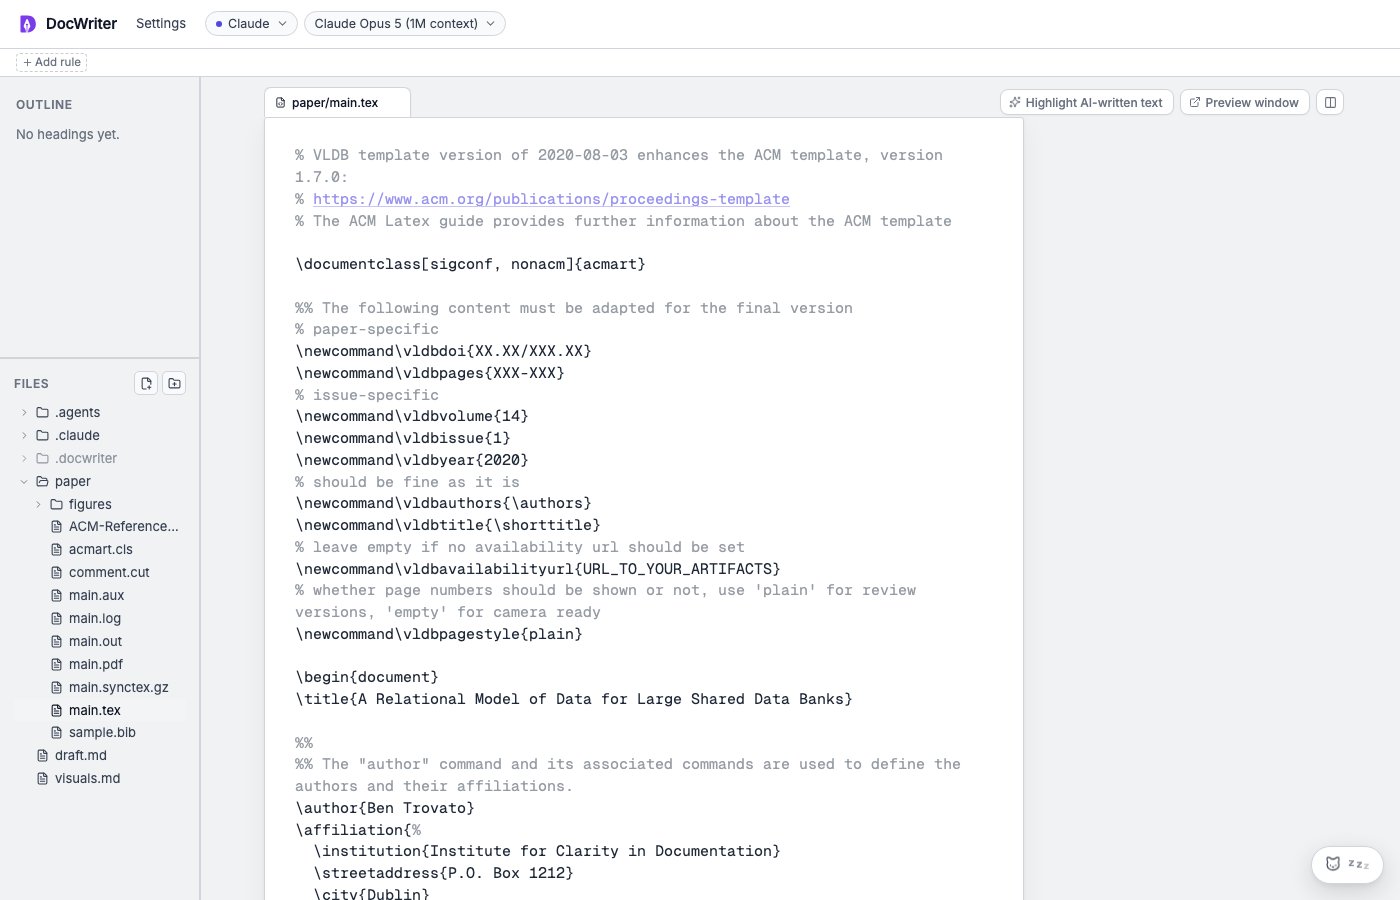
Open the main TeX file. You should see the TeX source and the project files in the file tree. The files remain normal workspace files, so Dropbox or Git can still track them.
Build the PDF
Both methods need thepdflatex hook so you can catch TeX errors and review the formatted paper after each accepted edit. Git adds a second hook later, when you send the change back. Do not add a Git hook for Dropbox.
Install a TeX distribution that provides pdflatex, bibtex, and synctex.
Confirm that each command is available on PATH:
pdflatex template. Change the entry file and output when the project does not use main.tex and main.pdf.
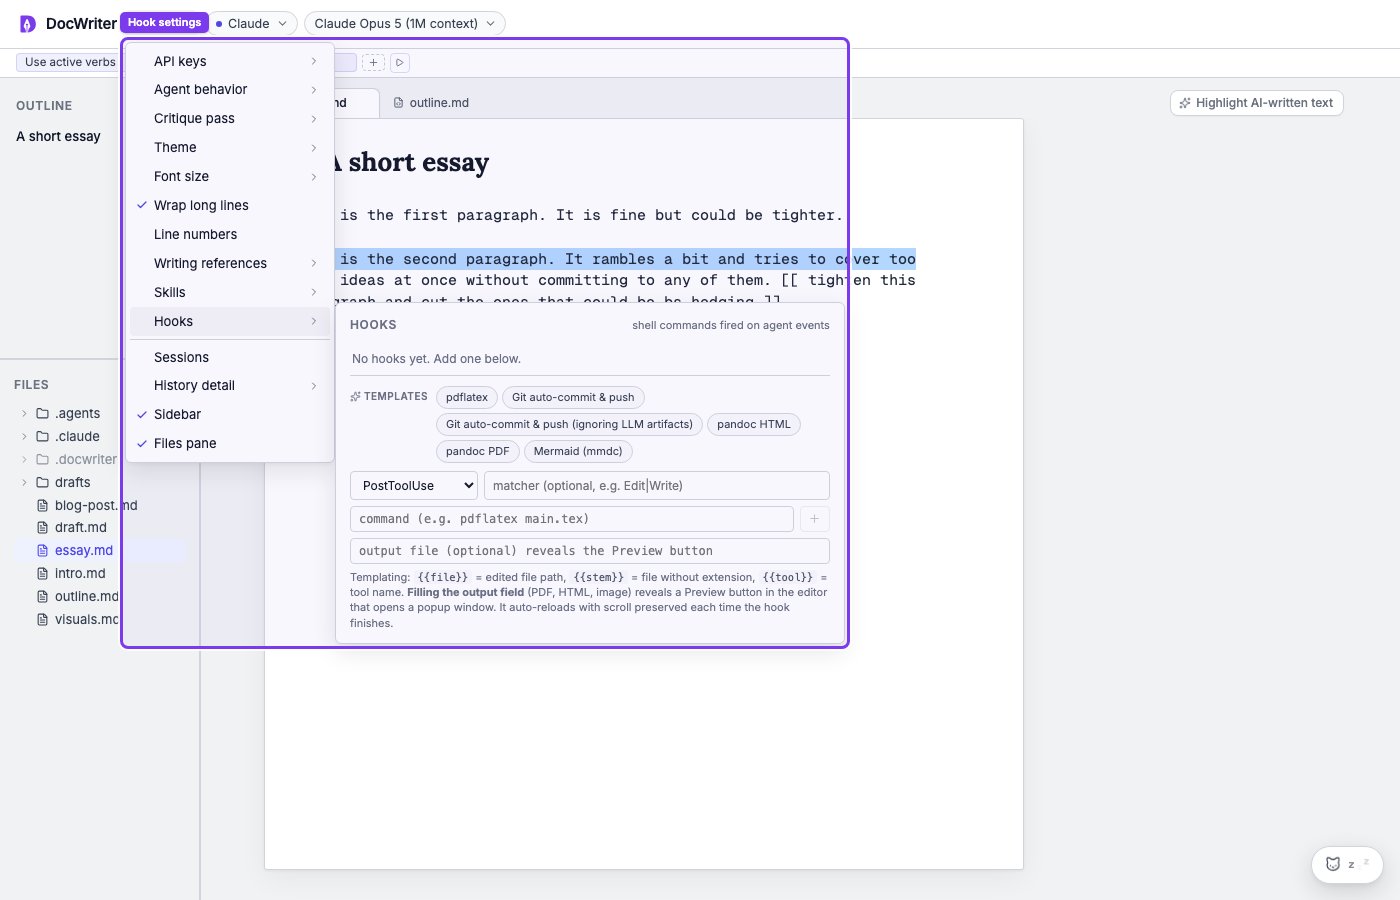
Choose the pdflatex template from the Hooks panel.
pdflatex, then tries bibtex, and then runs pdflatex twice more. Every pdflatex pass uses -synctex=1, which creates the .synctex.gz file used for source navigation.
Open the preview
You will see the Preview controls after the configured output exists. DocWriter also finds a PDF with the same path and base name as the active TeX file. For example,paper/main.tex matches paper/main.pdf.
Use the split preview to compare source changes with the formatted paper. Open the TeX source and choose the split preview button. You will see the generated PDF beside the source.
Select source text and choose Locate in PDF to find the matching place. DocWriter asks the synctex command for the page and position. When SyncTeX data is unavailable, DocWriter searches the PDF for the selected text. Double click the PDF to return to the source line.
SyncTeX navigation requires the build to use -synctex=1 and produce a .synctex.gz file. Source and PDF paths must remain inside the workspace. Verify both directions: Locate in PDF should move to the selected passage, and a double click in the PDF should open the matching TeX line.
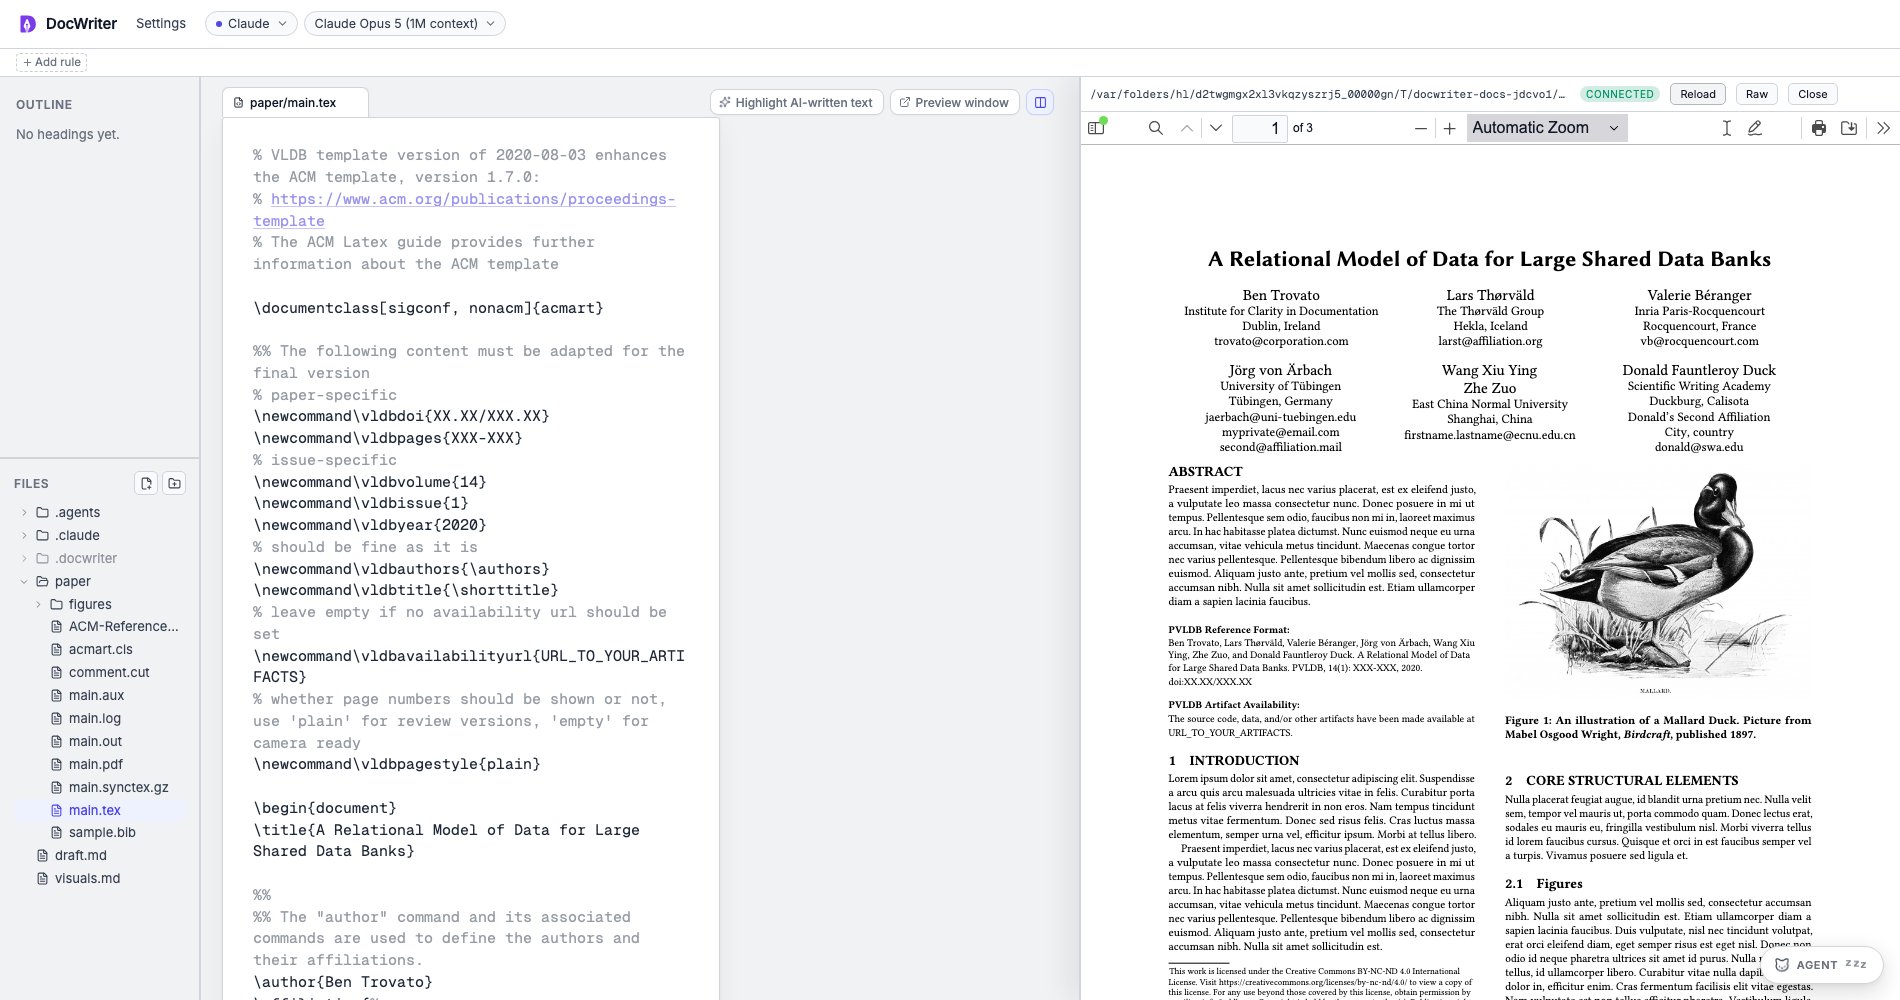
Use the split preview to keep the TeX source and generated PDF in the same workspace.
Ask for an edit
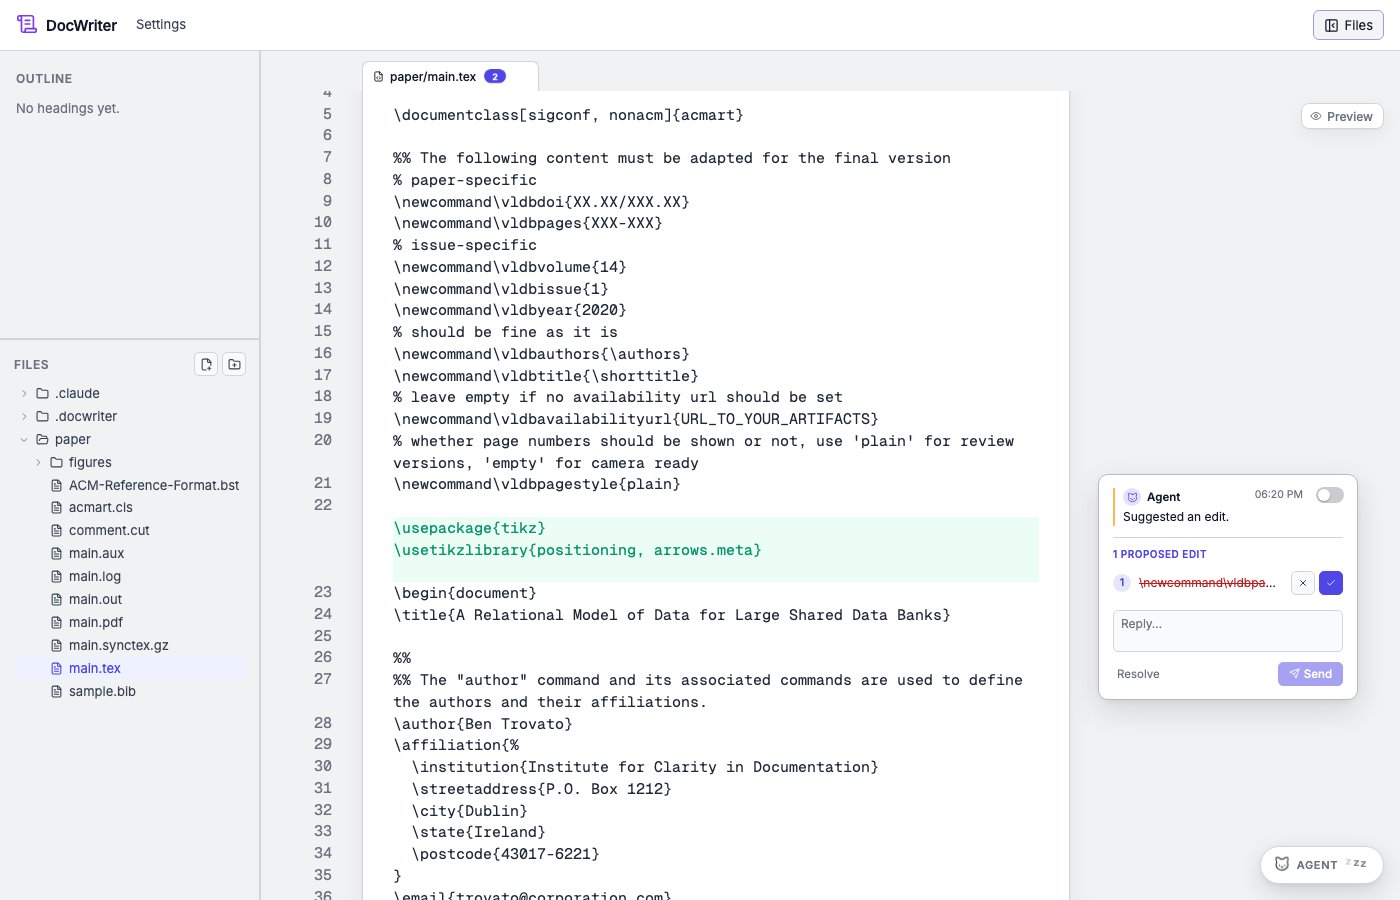
Select a passage when you want the agent to revise a specific part of the paper. You can also leave an inline directive in a TeX comment when you want the request to remain in the source until the agent handles it:% starts a TeX comment, so LaTeX ignores the request while it waits. Review the proposed source change before accepting it.
Send the change back
Use the same Dropbox or Git method you chose above.Dropbox
Dropbox copies the saved source files to Overleaf. You do not add a Git hook. Keep only thepdflatex hook.
Accepting an edit writes the workspace file. Wait for Dropbox to finish syncing, then open the Overleaf project and confirm the accepted source is there. If Overleaf still shows the old text, use Sync this project now in the project’s Dropbox integration.
Do not upload the locally compiled PDF into the Overleaf project. Overleaf builds its own PDF from the source. If Dropbox creates conflict copies of .pdf, .aux, or .log files, add Dropbox ignore rules for those build outputs.
Read Hooks if you need to change the pdflatex command or output path.
Git
Git needs a second step after thepdflatex hook. Review the Git diff, then commit and push:
:(exclude) paths keep local agent files out of the Overleaf or GitHub remote. Confirm that git status is clean except for those excluded files, and that the remote repository contains the new commit.
You pull and push changes yourself by default. Add a Git hook only after a manual pull and push work without a credential prompt. Open Settings, then Hooks, and choose a Git template. The private template skips .docwriter/, .claude/, and CLAUDE.md.
Read Hooks before you automate the build or Git commands. Read Pandoc, Mermaid, and Git for the Git templates.